Okta SAML setup #
Starburst Galaxy supports configuring Okta as a single sign-on (SSO) identity provider. There are two parts for full SSO participation, SAML and SCIM.
Follow the steps on this page to configure SAML connectivity between Okta and Galaxy, then go through Okta SCIM setup to complete the process.
Start on Starburst Galaxy #
-
In Starburst Galaxy’s navigation menu, open Access > Single sign-on.
-
Click
Configure single sign-on.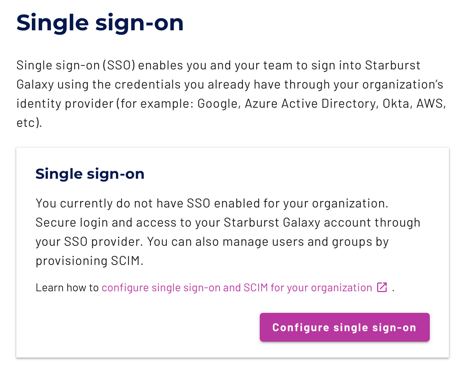
If Starburst Galaxy is already configured with an SSO provider, you must delete it before you add a new one. However, first see Delete an SSO provider to understand the consequences of SSO deletion.
-
Select Okta from the Select identity provider options.

-
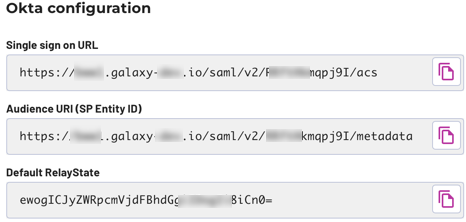
Take note of the strings in the next three fields, which are ready to copy into Okta. The labels above each field are the same wording as in Okta to help you identify the target location.
 Note: Leave this browser window open to this pane while you open a new browser window.
Copy SAML values to Okta #
-
In a new browser window, open the admin console for your Okta account or open your normal Okta account and click Admin in the top pane.
-
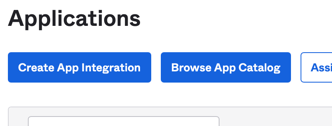
Click the menu menu and select Applications > Applications.
-
In the Applications pane, click Create App Integration.
-
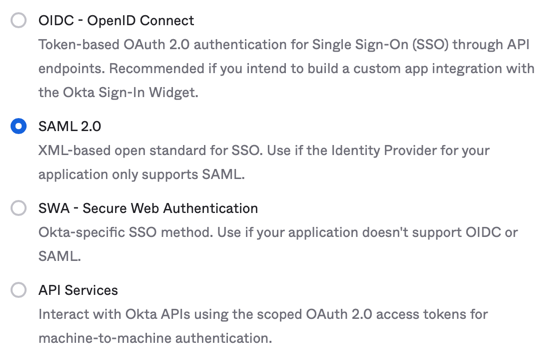
In the next pane, select SAML 2.0 and click Next.
-
This opens the Create SAML Integration pane, which has three tabs.
In the General Settings tab, provide a name for this app integration.
Remember that the name you choose is visible to specified Okta users in their Okta dashboards. The obvious name to give this app integration is Starburst Galaxy.
You can optionally upload a logo or image file to represent the app in the Okta dashboards of your users.
When done, click Next.
-
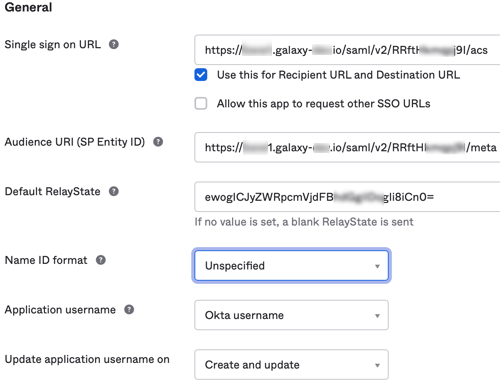
This opens the second tab, Configure SAML.
In the SAML Settings > General section at the top, notice that the first three fields have the same label names as the Starburst Galaxy pane you have open in another window.
Copy the URIs and token from each field in Starburst Galaxy to its matching field in Okta.
Leave all other controls on this page in their default settings. Scroll down and click Next.
-
This opens the third tab, Feedback.
You must select one of the two options on this tab, but providing feedback is optional. You can leave all fields blank, then click Finish.
Copy SAML values to Galaxy #
The last Finish click in Okta leaves you in the Sign On tab, Settings pane for your new app integration. The name you assigned is now visible at the top of the page.
Copy information from this Okta pane back to Galaxy. There are two ways to copy the required information:
- With a single metadata URL
- With manual entry of three fields
Metadata URL option #
Metadata URL is the easiest option to use because there is a single URL string to copy.
-
In Okta’s settings page for your app integration, select the Sign On tab.
-
Scroll down to the SAML Signing Certificates section, which shows a table with two rows for Types SHA-1 and SHA-2.
-
At the end of the SHA-2 row, click to drop down the Actions control.
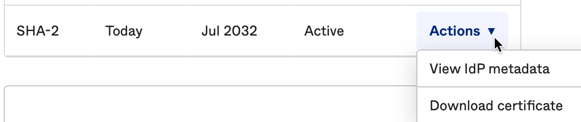
-
Select the View IdP metadata option.
This opens a new browser tab showing the contents of an XML file. The XML display varies with browser type, but we are not concerned with the XML content, only with the URL of this web page.
-
In this new tab, go to the address bar and copy the entire URL.
-
In Starburst Galaxy, in the pane you left open, make sure the Metadata URL option is selected. Paste the copied URL into the field labeled Identity Provider metadata URL
-
Proceed to test the configuration.
Manual entry option #
Manual entry requires you to locate and copy three fields of information from Okta to Starburst Galaxy.
-
In Starburst Galaxy, in the pane you left open, make sure the Manual entry option is selected.
-
In the browser window holding Okta, in the settings page for your app integration, scroll down to the SAML Signing Certificate section.
-
To the right of this section, locate SAML Setup with a button labeled View SAML setup instructions. Click this button.
-
This opens a new browser tab titled How to Configure SAML 2.0 for your-app-name Application. This page has three fields. As before, notice that the labels for each field correspond exactly with the labels of the fields on the Manual entry pane.
-
Copy the three field values from Okta to Starburst Galaxy, field to matching field.
-
Proceed to test the configuration.
Test configuration #
-
In Galaxy, click Test configuration.
-
If SAML communication between Okta and Starburst Galaxy is valid, you receive a green success message.

If you receive a red failure message, go back through these steps to make sure there is not a typo or other error.
Configure new user emails #
New users that get added via SCIM can optionally be sent a welcome email. By default this functionality is disabled, but can be enabled by checking the Send welcome email to new users checkbox.

Finish configuration #
With the test confguration successful, click Configure single sign-on to complete the process.

Proceed to SCIM configuration #
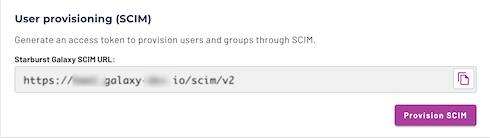
Completion of SAML configuration in Starburst Galaxy leaves you at the beginning of the Provision SCIM stage where the following dialog appears.

This marks a good stopping point if you need a break, but Okta is not yet configured to provide SSO authentication. You can click the No, do this later button or even log off, and your setup position is preserved. When you return, click Provision SCIM on this pane.
See Okta SCIM setup for the final configuration steps.
Configure Okta to send user attributes to Galaxy #
To use user attributes with policy expressions, you need to configure your IdP to send those attributes to Galaxy:
- In Okta, navigate to your application, open the General tab, and under the SAML Settings section, click Edit.
- Click Next to navigate to the second tab, entitled Configure SAML. In this section, update the attributes statements. For more information, visit the Okta developer guide.
- Click Next, and then Finish the configuration change. At this time, new sessions are configured for your SSO provider to send each user’s attributes as statements to Galaxy
Existing user sessions do not have updated attributes until the user’s session expires and they re-authenticate with your SSO provider. Similarly, if a user’s attribute statements are updated while that user has an existing session open, those attributes do not update until the user is re-authenticated via SSO.
Is the information on this page helpful?
Yes
No