OAuth clients #
OAuth clients allow users to connect to their Starburst Galaxy cluster using the available authentication method they prefer:
- username and password
- single sign-on (SSO)
When SSO is configured, and a user does not authenticate to Starburst Galaxy with a username and password, Starburst Galaxy is treated as an authorization server by the analytics tool such as Tableau.
When SSO is not configured, users can still benefit from OAuth by not needing to re-authenticate with username and password for a short period of time.
Client types #
There are two types of OAuth clients:
- Public
- Private
Public clients are intended for desktop versions of supported analytics tools. The expectation for public clients is that there is one public client per Starburst Galaxy account per analytics tool instance. The public client is visible to all users. The public client runs the Authorization Code Flow with Proof Key for Code Exchange (PKCE) and therefore does not have a client secret.
Private (confidential) clients are intended for analytics tools that are a SaaS offering. The private client uses the Client ID and Secret to authenticate using the authorization code flow.
Supported clients #
Supported clients for OAuth clients are as follows:
Required privileges #
Your current role must have the MANAGE_OAUTH_CLIENT
privilege to
allow creating and deleting OAuth clients.
All users have the VIEW_PUBLIC_OAUTH_CLIENT privilege to view only public
OAuth clients.
Configuration #
Use the following links to configure OAuth clients for your analytics tool:
OAuth clients list #
Open the Access control > OAuth clients pane to see a list of current OAuth clients. If none are created yet for a Starburst Galaxy account, this pane shows a Create new OAuth client button.
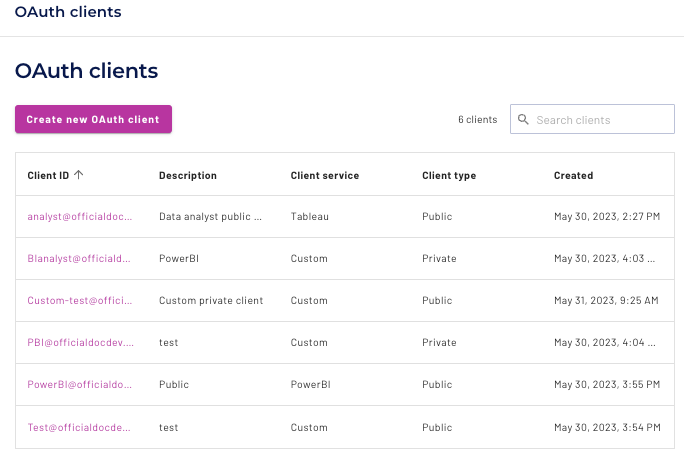
The list of OAuth clients has the following sortable columns:
- Client ID: The Client ID for an OAuth client. The complete Client ID is generated for you based on an identifier you enter, which must be a valid email name, and the name of your environment. The format resembles an email address. The link opens the details for an OAuth client.
- Description: The description for this OAuth client.
- Client service: Indicates whether the client service is Custom or a specifically supported product such as Tableau.
- Client type: Indicates whether the OAuth client service is Private or Public.
- Created: The date and time an OAuth client was created.
Create a public OAuth client #
Refer to the fields reference for more information about completing the dialog.
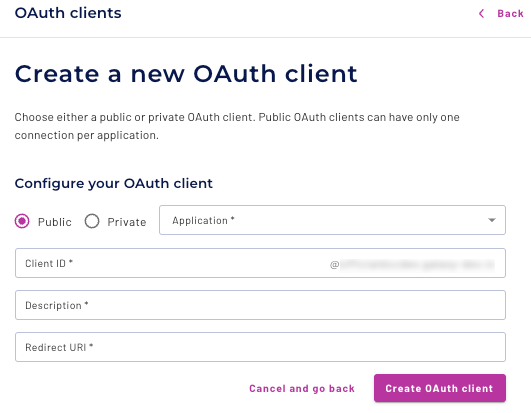
- Click Create new OAuth client.
- Select the Public option.
- From the Application menu, select an application.
- Enter a unique Client ID. Do not enter any spaces.
- Enter a Description.
- Enter up to 5 Redirect URIs if the Application is Custom. Click + Add URI to enter additional URIs.
- Click Create OAuth client. A dialog indicates your OAuth client was created.
- Click Done. The client is added to the OAuth clients list.
Create a private OAuth client #
Refer to the fields reference for more information about completing the dialog.
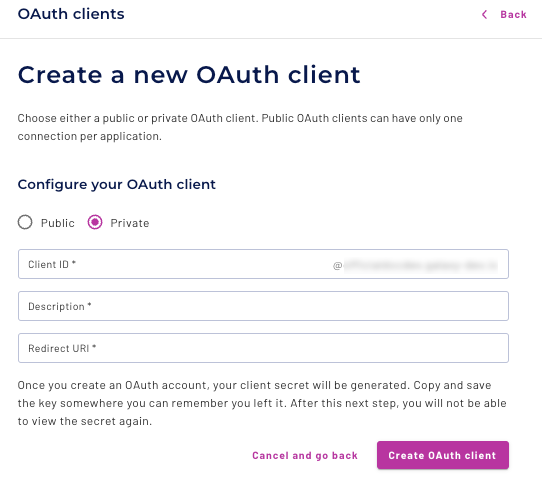
- Click Create new OAuth client.
- Select the Private option.
- Enter a unique Client ID. Do not enter any spaces.
- Enter a Description.
- Enter up to 5 Redirect URIs. For private clients the URIs must begin with HTTPS. Click + Add URI to enter additional URIs.
- Click Create OAuth client. A dialog indicates your OAuth client was created.
- Copy the OAuth client secret to a secure location. Select the check box to confirm you have copied the key. This is the only opportunity to copy the key. If you lose the key, you must delete the client and create a new one.
- Click Done. The client is added to the OAuth clients list.
Fields reference #
Use the following table to configure OAuth clients.
| Field | Value |
|---|---|
| Client type | Public or Private. |
| Application | Applicable to Public clients only. Use the menu to select
among the following options:
|
| Client ID | Enter any username. The username does not need to match an existing email address, but it must follow the same rules as email names. That is, the username must contain only printable US-ASCII characters not including [, ] or \.The grayed out text@youraccount.io is automatically appended to the username after the Create OAuth client button is clicked. |
| Redirect URI | The endpoint implemented by the analytics client to receive the
authorization code from Starburst Galaxy via the web browser. The
value of the redirect URI depends on the client.
Custom applications require manual entry
of up to 5 redirect URIs.
Redirect URIs are pre-populated for Tableau and PowerBI and
cannot be edited:
|
The following table describes fields that are generated by Starburst Galaxy after an OAuth client is created.
| Field | Description |
|---|---|
| OAuth client ID | The client identifier. |
| OAuth client secret | The secret key for a private OAuth client. |
| Public reference |
Only applies for public PowerBI clients. It must be used when
constructing the Host field for PowerBI. The expected format is
https://mycluster.trino.galaxy.starburst.io/oauth2/(public-reference-here)/public-client.
|
Edit an OAuth client #
- In the OAuth clients list, click the Client ID link for the client you want to edit.
- Click Edit OAuth client.
- Edit the modifiable fields of Description and Redirect URIs.
- Click Save in the dialog.
Delete an OAuth client #
- In the OAuth clients list, click the Client ID link for the client you want to delete.
- Click Delete OAuth client.
- Click Yes, delete in the confirmation dialog.
Is the information on this page helpful?
Yes
No